Timesheets for administrators
A timesheet administrator can:
These tools are useful for managing staff time, maintaining structured oversight and controlling work records.

|
It is best to set up your timesheet preferences before you start using them as some settings are difficult to change once times have been entered. - First day of the week. Monday is the default first day of the week. If you need to change this, do so before you enter any times. The first day of the week is locked as soon as you enter a time in timesheets. If you have started entering times and want to change the first day of the week, contact Support.
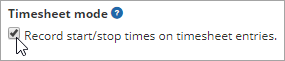
- Timesheet mode - hours or start/stop times. You can switch mode at any time but the mode will not change for users untill the beginning of the following week. Existing timesheets will remain on the current setting.
- Payment frequency and timesheet categories. These can be changed at any time and with immediate effect.
|

|
-
To be a timesheet administrator, you need to have a security role that includes Timesheet - admin.
-
To add timesheet task categories, you also need a security role that includes Timesheet tasks - View / Add / Edit.
-
You can include contractors in timesheets.
-
Staff and contractors must have been added to the farm in FarmIQ for them to appear on that farm's timesheets.
|
Set up timesheets
Timesheets can be set up in FarmIQ to suit your organisation. It is best to set up your timesheet before you start using them as some settings are difficult to change once times have been entered.
You can customise the following timesheet settings:
|
|
-
Timesheets are set up at Organisation level so they have the same format on all farms in the organisation.
|
Payment frequency
Payment frequency determines the default time range that is used when you export the Timesheet report. You can change the time range before you export.
You can select:
-
weekly - starting on your first day of the week,
-
fortnightly - starting on your first day of the week or
-
monthly - from the first of the month.
To change payment frequency, see Change timesheet settings.
First day of the week
Monday is the default first day of the week. If you want to change this, do so before you enter any times. The first day of the week is locked as soon as you enter a time in timesheets. If you have started entering times and want to change the first day of the week, contact Support.
To change the first day of the week, see Change timesheet settings or contact Support.
Timesheet modes
You can change timesheet modes between:
-
Recording times by entering hours per task
-
In this mode, times are recorded by selecting a task or leave category and recording the total hours spent on that task on that day.
-
Recording by hours per task is the default mode.
-
Recording times using start/stop times
-
In this mode, times are recorded by selecting a task or break category and recording start and stop times for that task or break. Hours worked per task are calculated based on the start and stop times. Break times that overlap with hours spent on tasks are deducted from the time of the work task.
|
|
-
If the timesheet mode is changed, the changes will take effect at the start of the next week. Existing timesheets remain on the current setting.
|
To change timesheet mode, see Change timesheet settings.
Timesheet task and leave categories
You can:
-
add your own timesheet categories so that you can get timesheet reporting that is best suited for your farm.
-
edit timesheet categories that you have added.
-
delete timesheet categories that you have added, provided they have not been used to record hours in timesheets or rosters.
|
|
-
Leave categories you create will appear in both timesheets and rosters.
-
Categories you create, that are not leave, are reported on individually in timesheets but are all included as Work in rosters.
-
You cannot edit or delete FarmIQ default timesheet categories.
|
To add, edit or delete timesheet task and leave categories, see Change timesheet settings.
Change timesheet settings
-
At Organisation level, click Office > Organisation details > General details.
-
Click the Timesheets/Rosters tab on the left hand side.
-
Click Edit.
-
You can select:
-
the Payment frequency
-
the First day of the week
-
Timesheet mode. If you want staff to:
-
enter the total number of hours per task, leave the checkbox clear
-
select start and stop times for tasks, select the checkbox.
-
Categories
-
You can add custom task and leave categories. Follow the procedure from Step 4 in To add new task and leave categories, below.
-
Correctly identifying the category as Paid and/or Leave is important for accurately calculating total paid hours and total hours worked in timesheets and rosters.
-
Once you have finished making changes, click Save.
-
To return to the farm:
-
click Farms
-
click the View button next to the farm you want to return to.
-
At Organisation level, click Office > Organisation details > General details
-
Click the Timesheets/Rosters tab.
-
Click Edit.
-
In Categories, click Add.
-
Enter a Name.
-
Select one or both checkboxes to make the category Paid and/or Leave.
For example, annual leave would be Paid and Leave while a specific work task category would be Paid but not Leave.
-
If you selected Leave, you can select a colour for the category.
-
Correctly identifying the category as Paid and/or Leave is important for accurately calculating total paid hours and total hours worked in timesheets and rosters.
-
Click OK.
-
Click Save.
-
At Organisation level, click Office > Organisation details > General details.
-
Click the Timesheets/Rosters tab.
-
Click Edit.
-
Click the edit pencil next to the category you want to edit.

-
You can only edit categories that you have added.
-
Make the required changes.
-
Click OK.
-
Click Save.
-
At Organisation level, click Office > Organisation details > General details.
-
Click the Timesheets/Rosters tab.
-
Click Edit.
-
Click the dustbin icon next to the category you want to delete.

-
You can only delete categories that:
-
you have added.
-
have not been used to record hours in timesheets or rosters.
Manage submitted timesheets
Some farms will require staff to submit their timesheets to a manager or administrator for approval.
The Timesheet administrator must have the required security role permissions to see and approve, reject or make changes to hours submitted.
A colour coded square next to each staff member's name shows the status of times they have recorded. The key, which appears at the bottom of the Timesheet, shows what status the colours indicate. These are explained in this table:
|
|
|
|
|
|
No times entered
|
Times have been entered but not submitted
|
Times for the week have been submitted
|
Times for the week have been approved
|
-
Click People > Scheduling > Timesheets.
-
Select the week you want to approve
-
Click the staff member's name
-
If the timesheet has:
|
No issues
|
Issues
|
- Click Approve.

|
You can:
- Click Reject.

- Enter a rejection comment with the reason.
- Click Add.
OR
- Update hours in the timesheet.
- Click Approve.
|
|
|
-
If the administrator rejects the timesheet, the staff member can make changes to resolve any issues and resubmit the timesheet.
-
If the administrator changes the hours, the changed times will be highlighted in red.
|
If the times need to be changed for a week that has already been approved, the administrator can unapprove the week and then make changes.
-
On the Navigation bar, click People > Scheduling > Timesheets.
-
Select the week you want to unapprove.
-
Click the staff member's name.
-
Click Unapprove.

-
The status of the timesheet will go back to Submitted.
-
The times can then be changed and the timesheet can be approved again.
Record hours on behalf of others
You can record hours for staff and contractors who have been added to FarmIQ.
To record hours on behalf of others, see Record hours in timesheets.
If you can't see the person's name on the list in the timesheet, check that they have been added to the farm in FarmIQ.
Timesheet reports
Timesheet administrators can view and export Timesheet reports.
Timesheet reports show, for any selected week:
-
a list of people who have been added to the farm in FarmIQ
-
total paid hours entered for each person per day
-
the total paid hours entered by all staff per day
-
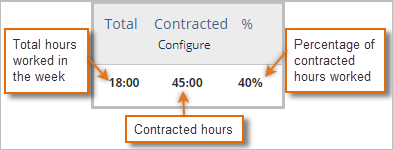
contracted hours per week for each staff member and the percentage of hours worked
-
total contracted hours for all staff and percentage of hours worked
-
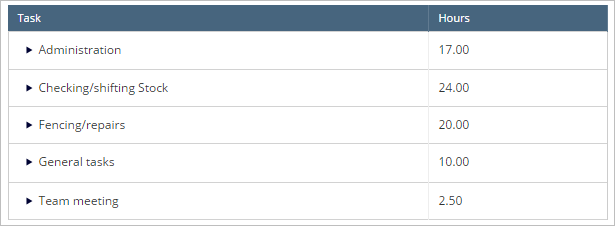
a summary of paid and unpaid hours entered for each task or leave category by all staff members, like in this example:
|
|
-
If a staff member has any category of paid leave recorded, their recorded hours for that day will be highlighted red in the timesheet report.
|
View the Timesheet report
Staff who have been added to the farm in FarmIQ and contractors who have been set up to do so, appear on the Timesheet report.
-
At Farm Level, click People > Scheduling > Timesheets.
-
Select the week you want to see using the forward and backward arrows or the dropdown calendar.

-
To show details for task or leave categories or for a staff member, click the expansion arrow next to the name.
Export the Timesheet report
When you export timesheets:
-
Only people who have times saved in the time period are included.
-
Total paid hours are shown on sheet one of the worksheet.
-
Hours for each timesheet category are shown separately on the following sheets.
-
On the Navigation bar, click People > Scheduling > Timesheeets.
-
Click Export.
-
Select the Start date and End date for the period you want to export.
-
The default date range is based on the payment period set up for your timesheet.
-
Click OK.
Contracted hours
You can set up the timesheet report to show the contracted weekly hours of your staff members and the report will display the number of hours worked as a percentage of the total contracted hours.
-
On the Navigation bar, click People > Scheduling > Timesheets.
-
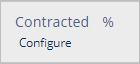
On the Timesheet report, under the Contracted heading, click Configure.
-
Click the edit pencil for the staff member.
-
Click Employment details on the left hand side of the screen.
-
Enter the Contracted hours per week.
-
Click Save.
This information is displayed on the Timesheet like this:
-
To see this information on the timesheet, click People > Scheduling > Timesheets.
Find out more